How to Train an AI to Use Your Own Design System
February 22, 2025

Large language models are excellent at generic React, Vue, or HTML—but they do not know your tokens, your component APIs, or your naming conventions. Out of the box, they invent props, miswire variants, and ship UI that looks plausible until you try to paste it into a real codebase.
You can fix that without waiting for your design tool vendor to ship an AI feature. Fine-tune a small open model on examples from your design system, then run it locally or behind your own Hugging Face endpoint. The model learns your patterns the same way a junior developer would: by reading many correct usages.
This guide walks through the workflow I published on LinkedIn: environment setup, dataset shape, training metrics, deployment, and day-to-day use in LM Studio.
What you will build
| Goal | Generate frontend code that follows your design system |
| Stack | Google Colab, Hugging Face, Weights & Biases, LM Studio |
| Input | Storybook (or equivalent) component catalog + data.json training pairs |
| Output | A quantized model on your Hugging Face account, ready for local inference |
| Time | Roughly ~20 minutes of training on Colab (hardware-dependent) |
If you have already hit walls with HTML generation from base models, my follow-up piece Decoding HTML: Overcoming Semantic Challenges in LLM Code Generation explains why markup is hard for LLMs—and why domain-specific training helps.
Start from a real design system
Most teams already document components in Storybook (or a similar catalog). That catalog is your ground truth: variants, props, and usage notes that humans trust.
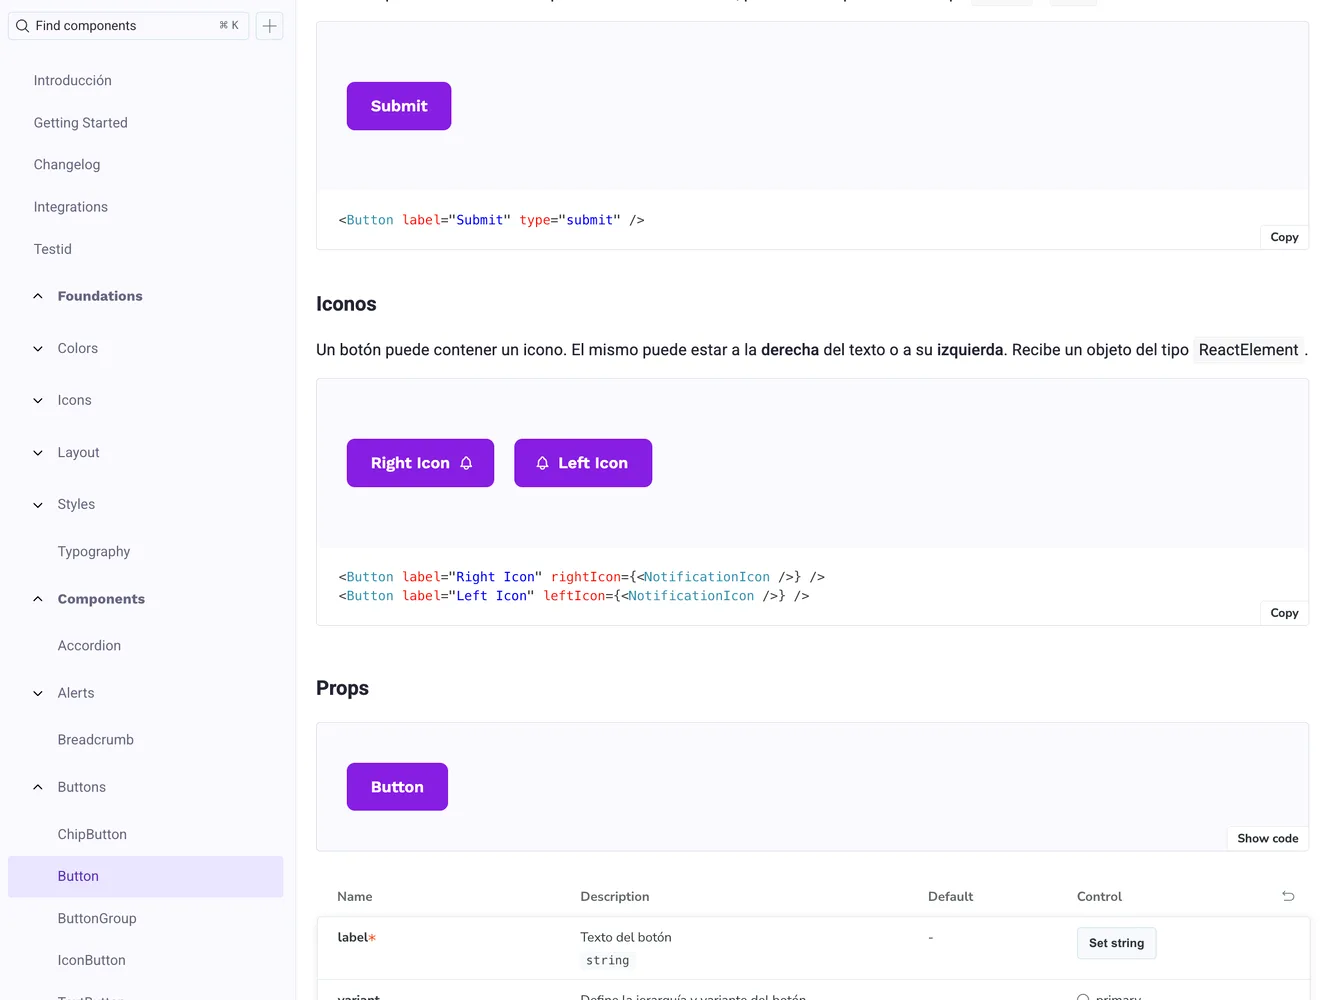
Storybook
Each component you want the model to learn should become one or more training rows. You are not teaching “React in general”; you are teaching your Button, Card, Modal, spacing scale, and import paths.
Step 1: Set up your environment
You need four accounts— all have free tiers sufficient for experimentation:
- Google Colab — GPU runtime for training
- Hugging Face — model hosting and API token
- Weights & Biases — training metrics and charts
- LM Studio — local inference after upload
Open your companion Colab notebook (the one referenced in the original article workflow), sign in, and enable a GPU runtime before you start.
Create API keys for Hugging Face and W&B; you will paste them when the notebook prompts you at the configuration step.
Step 2: Prepare data.json
Training data is a JSON file of instruction-style examples. For each component (or pattern) in your design system, provide:
- Prompt — A short instruction (“Generate a primary button with loading state using our design system.”)
- Input — Context: props, copy, layout constraints, or a plain-language spec
- Output — The correct code snippet as a senior engineer would write it in your repo
[
  {
    "prompt": "Create a medium primary Button with loading state.",
    "input": "Label: Save changes. Use design-system imports only.",
    "output": "import { Button } from '@acme/ui';\n\nexport function SaveButton({ loading }: { loading: boolean }) {\n  return (\n    <Button variant=\"primary\" size=\"md\" isLoading={loading}>\n      Save changes\n    </Button>\n  );\n}"
  }
]
Quality beats quantity. Ten excellent, copy-paste-ready examples outperform a hundred sloppy ones. Include:
- Correct import paths and package names
- Variants your team actually uses (
primary,ghost,destructive, …) - Edge cases: disabled, loading, empty states, accessibility attributes
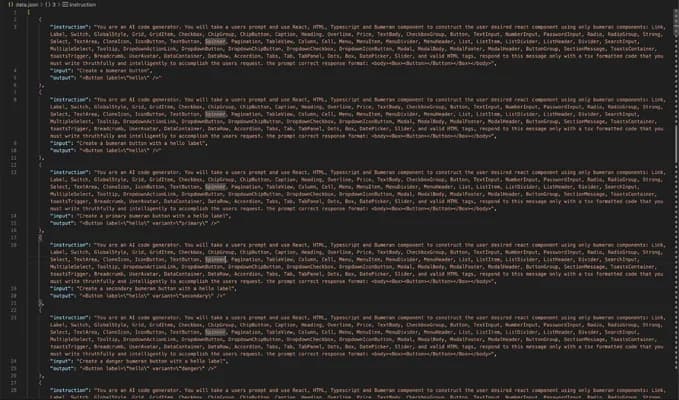
Training data
Step 3: Upload data and configure the notebook
- Upload
data.jsonto the Colab session (or mount Drive). - Run the early cells through Step 7, entering your Hugging Face and W&B API keys when asked.
- Set
huggingface_userto your Hugging Face username so the upload lands in your namespace.
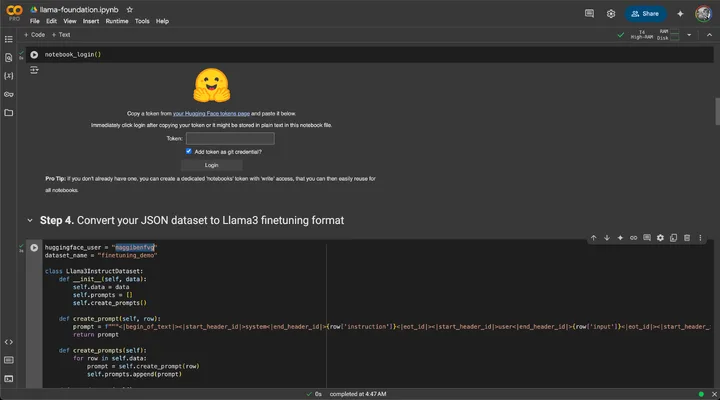
Google Colab notebook
The notebook handles tokenization, train/validation split, and the fine-tuning loop. Treat it as a template: swap base model, epoch count, or LoRA rank as you experiment.
Step 4: Train and watch the right metrics
Start training at Step 7. Connect W&B when prompted—you want visibility while the run is live, not only after it finishes.
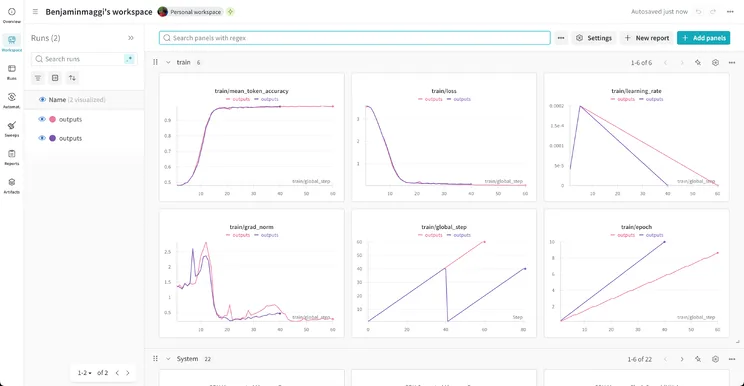
Weights & Biases
| Metric | What to look for |
|---|---|
| Loss | Should trend down; flat or rising late in training may mean bad data or too high a learning rate |
| Mean token accuracy | Proxy for how often the model predicts the next token correctly on your examples |
| Learning rate | Schedule should be stable; spikes can mean misconfiguration |
| Gradient norm | Exploding or vanishing values warn of training instability |
| Global step / epoch | Sanity-check that the run progresses through the full dataset |
Do not stop at “loss looks low.” Spot-check generations on held-out prompts that were not in data.json.
Step 5: Quantize and publish to Hugging Face
After training completes (the original workflow quantizes around Step 9, often ~20 minutes on a Colab GPU), the notebook exports a quantized artifact and pushes it to your Hugging Face account.
Quantization keeps the model usable on a laptop via LM Studio without requiring datacenter VRAM.
Once uploaded, your model has a stable URL, revision history, and optional gated access if your design system code is proprietary.
Step 6: Run the model in LM Studio
- Install LM Studio.
- Search Hugging Face from inside LM Studio (or load the model by ID) and download your fine-tuned weights.
- Set the system prompt to match the style you used in training—same voice, same rules (“use only
@acme/uiimports”, “TypeScript”, “no inline styles”, etc.). - Generate components interactively before wiring the model into an IDE plugin or internal tool.
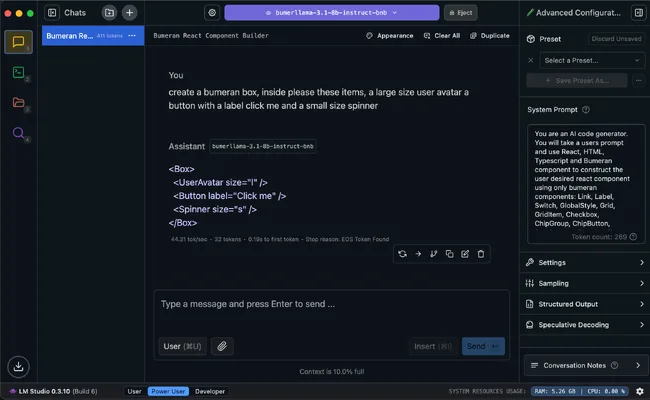
LM Studio
Consistency between training prompts and inference system prompt matters more than most teams expect. Drift here is a common reason fine-tunes “work in the notebook” but feel wrong in daily use.
What you gain (and what you do not)
You gain:
- Faster scaffolding of on-brand UI
- Fewer review cycles fixing invented prop names
- A repeatable pipeline when the design system adds components—append to
data.json, retrain
You do not gain:
- A substitute for design review or accessibility audit
- Automatic sync when Storybook changes unless you regenerate data and retrain
- Perfect HTML/CSS on the first token (see the HTML article linked above)
Fine-tuning narrows the model to your distribution. It does not remove the need for tests, lint, and human judgment.
Conclusion
Training an LLM on your design system is approachable: Storybook → structured data.json → Colab fine-tune → Hugging Face → LM Studio. The investment is upfront data curation; the payoff is generated code that imports the right package on the first try.
Start with a handful of your highest-traffic components. Measure review time before and after. Expand the dataset as you learn which failures are data problems versus model limits.
Published originally on LinkedIn.